Last Updated on 07/06/2023 by Kevin Agar
Sometimes there is a need to program or reprogram the temperature sensors used with MaxAir. This is a description of how to go about this and what to change.
These sensors can be purchased, already programmed, from PiHome here and look like this.
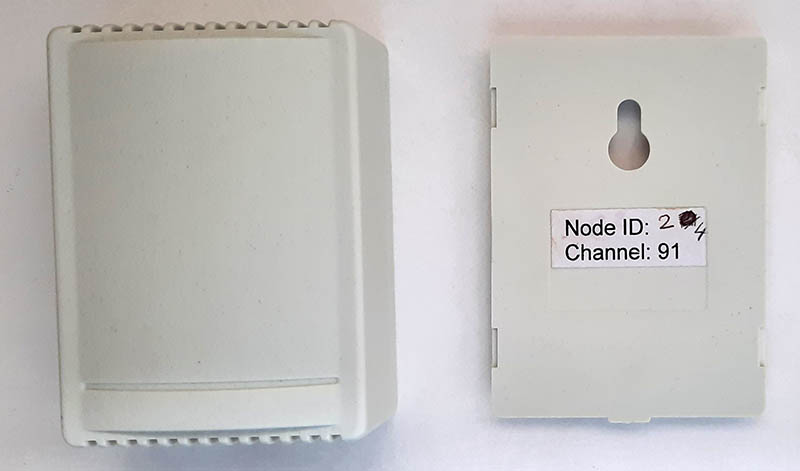
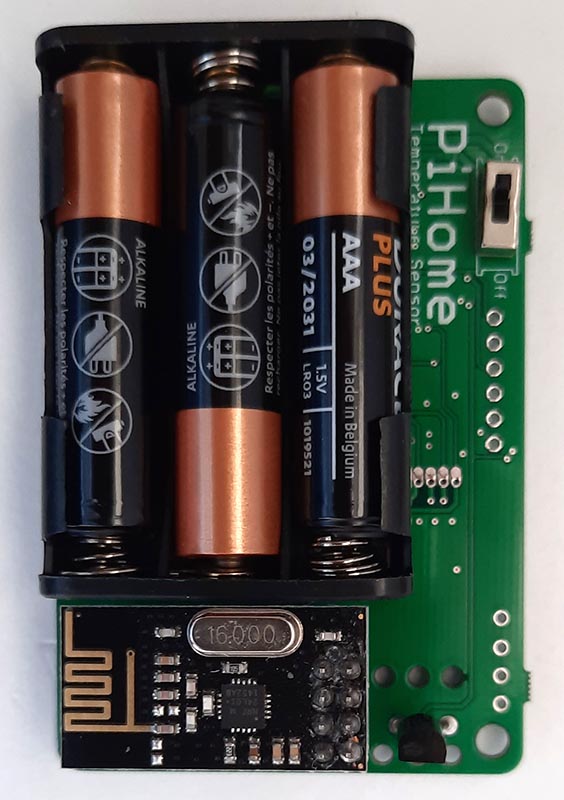
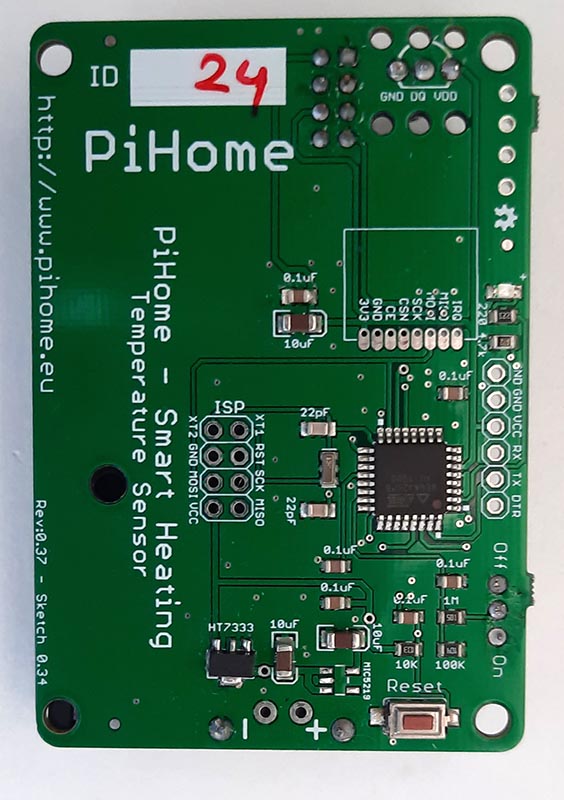
To reprogram the sensors you need an Arduino nano set up as a programmer.
I used a board supplied by PiHome to connect to the nano and added some pogo pins for the connection to the temperature sensor. The assembled board is shown below.
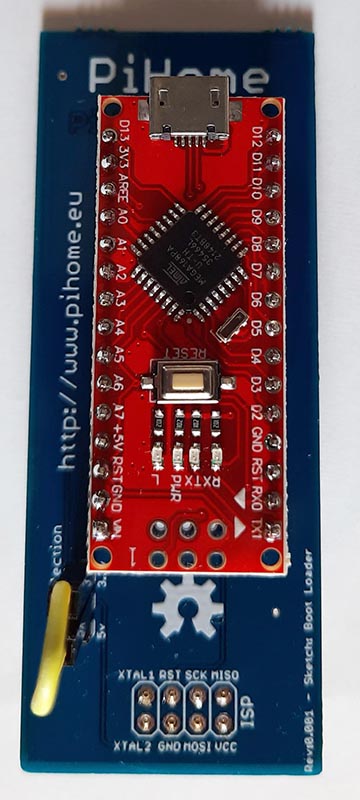
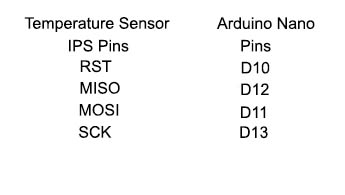
If you’re wiring this yourself then the pins are
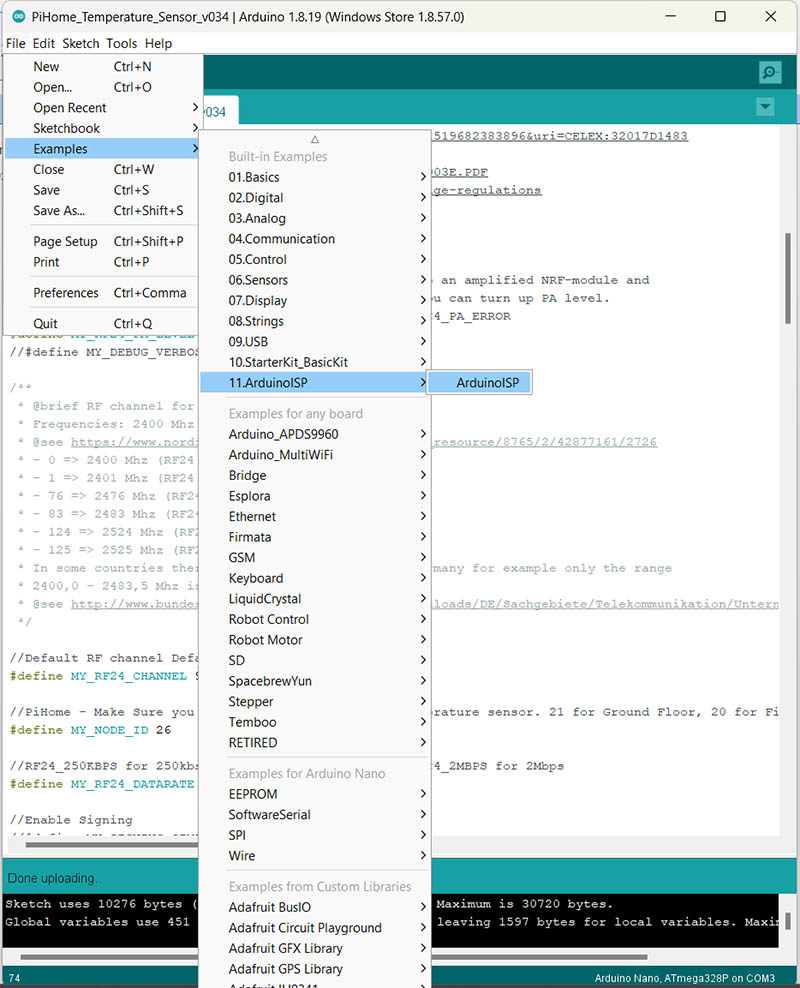
To program the Arduino you need to use the Arduino IDE. Connect the Arduino nano to your PC via the USB connector. Start the Arduino IDE and set the following values
Under Files set the following
Under Tools set the following
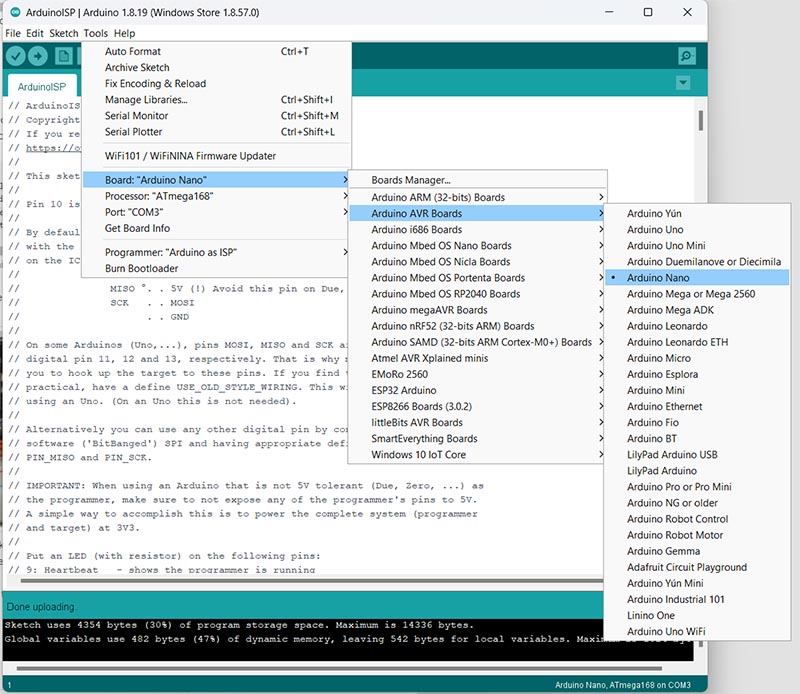
Compile and Upload the sketch to the Arduino Nano. The RX and TX LEDs should flash during the process and it should finish without any errors.
Next, you need to use the newly set up Arduino nano as a programmer to program the Temperature sensor
Power cycle the Arduino nano and upload the Temperature sensor sketch. This can be found on GitHub here or you can also find it on the MaxAir Controller at /var/www/Arduino_Sketches/nRF24L01/PiHome_Temperature_Sensor_v035
Originally I changed the Sketch slightly.
On line 96 I changed it from
define COMPARE_BVOLT 0 // Send battery voltage only if changed? 1 = Yes 0 = No, > 1 – force send if it value not sent that number of times
to
define COMPARE_BVOLT 1 // Send battery voltage only if changed? 1 = Yes 0 = No, > 1 – force send if it value not sent that number of times
Update: Checking the nodes_battery table in the database, there is a large time difference between entries. This is causing errors with node alert emails being sent as the limit for no battery reading messages is set to 120 minutes. Rather than increase this limit, I decided to do continuous battery voltage readings. Therefore I reset the ‘define COMPARE_BVOLT’ to 0
define COMPARE_BVOLT 0 // Send battery voltage only if changed? 1 = Yes 0 = No, > 1 – force send if it value not sent that number of times
On line 109 I changed it from
define MIN_VALUE 80 // threshold battery level to trigger notifications
to
define MIN_VALUE 50 // threshold battery level to trigger notifications
This was because I couldn’t set 50% in the MaxAir GUI. This has since been changed to an initial value which can now be changed in the MaxAir GUI, so I reverted back to the original
define MIN_VALUE 80 // threshold battery level to trigger notifications
Also, don’t forget to change the Temperature Sensors Node ID on line 68
define MY_NODE_ID 23
and ensure the RF Channel on line 65
define MY_RF24_CHANNEL 91
is the same channel the gateway is set to
Add to the boards by going to File>Preferences>settings and adding the following link to ‘Additional Boards Manager URLs:’
https://mcudude.github.io/MiniCore/package_MCUdude_MiniCore_index.json
If there are already links in the ‘Additional Boards Manager URLs:’ just add the new one with a comma, for example:-
https://dl.espressif.com/dl/package_esp32_index.json,http://arduino.esp8266.com/stable/package_esp8266com_index.json,https://mcudude.github.io/MiniCore/package_MCUdude_MiniCore_index.json
If the above doesn’t work then go to the boards manager and search minicore
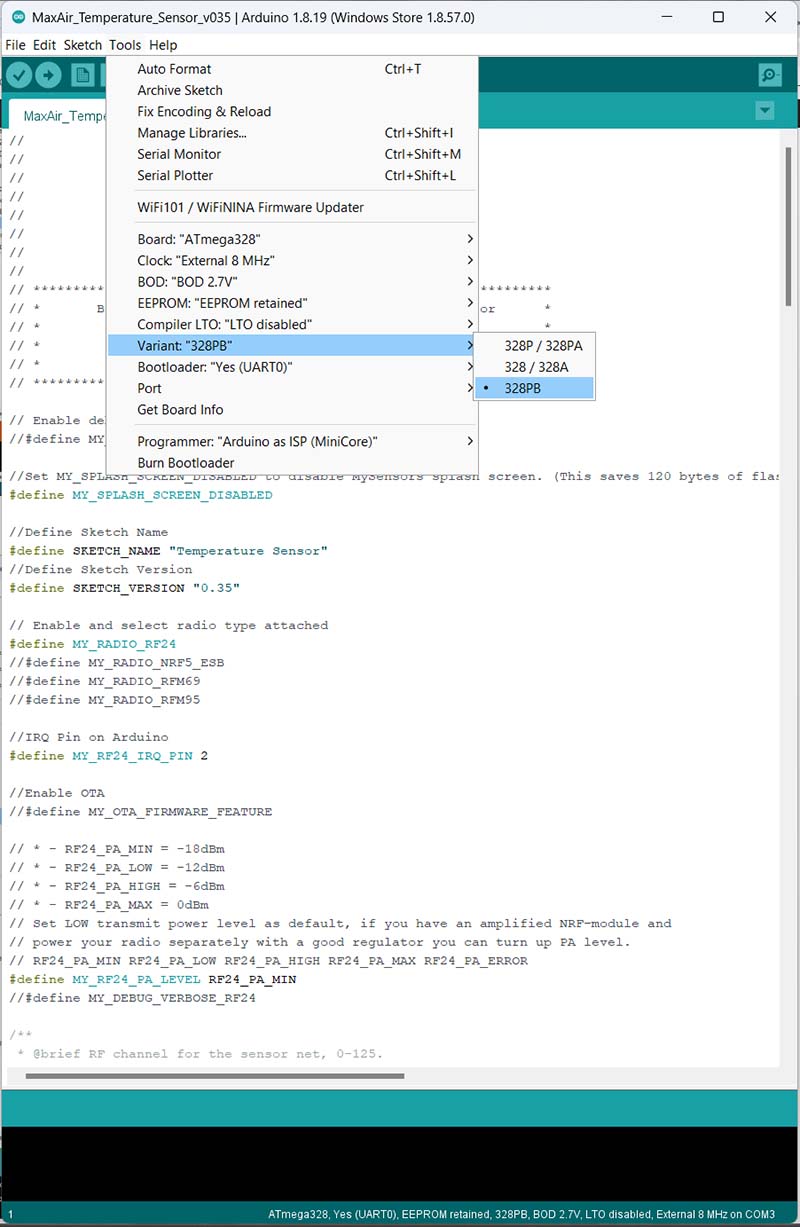
Set the following in the Arduino IDE
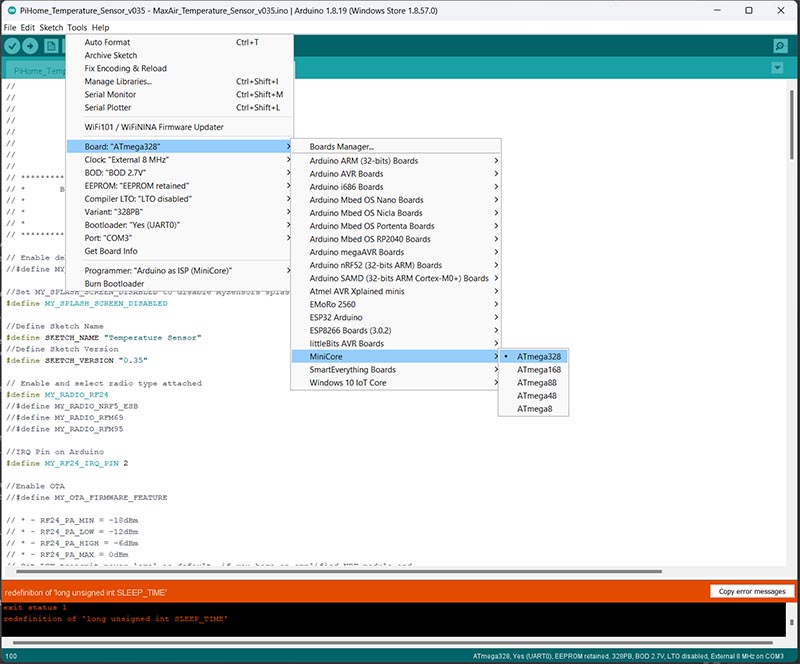
You need to check the variant of your temperature sensor which is written on the main processor chip. It should be either ATmega328P or ATmega328PB. Set the Variant to the correct value
Set the jumper on the programmer to 5V and make sure the batteries are not inserted in the temperature sensor
Having set it all up, connect the programmer to the temperature sensor and then select
Sketch>Upload Using Programmer Ctrl+Shift+U
The lights on the programmer should flash. Wait until it says it’s completed and only the green power LED is on. Disconnect the programmer, and check the temperature sensor is communicating with the MaxAir Gateway.
I did find that sometimes it didn’t work on the 1st attempt. If it does fail then just try again