Last Updated on 11/01/2023 by Kevin Agar
I decided to buy a BME688 Sensor to try and connect it to a Wemos D1 mini.
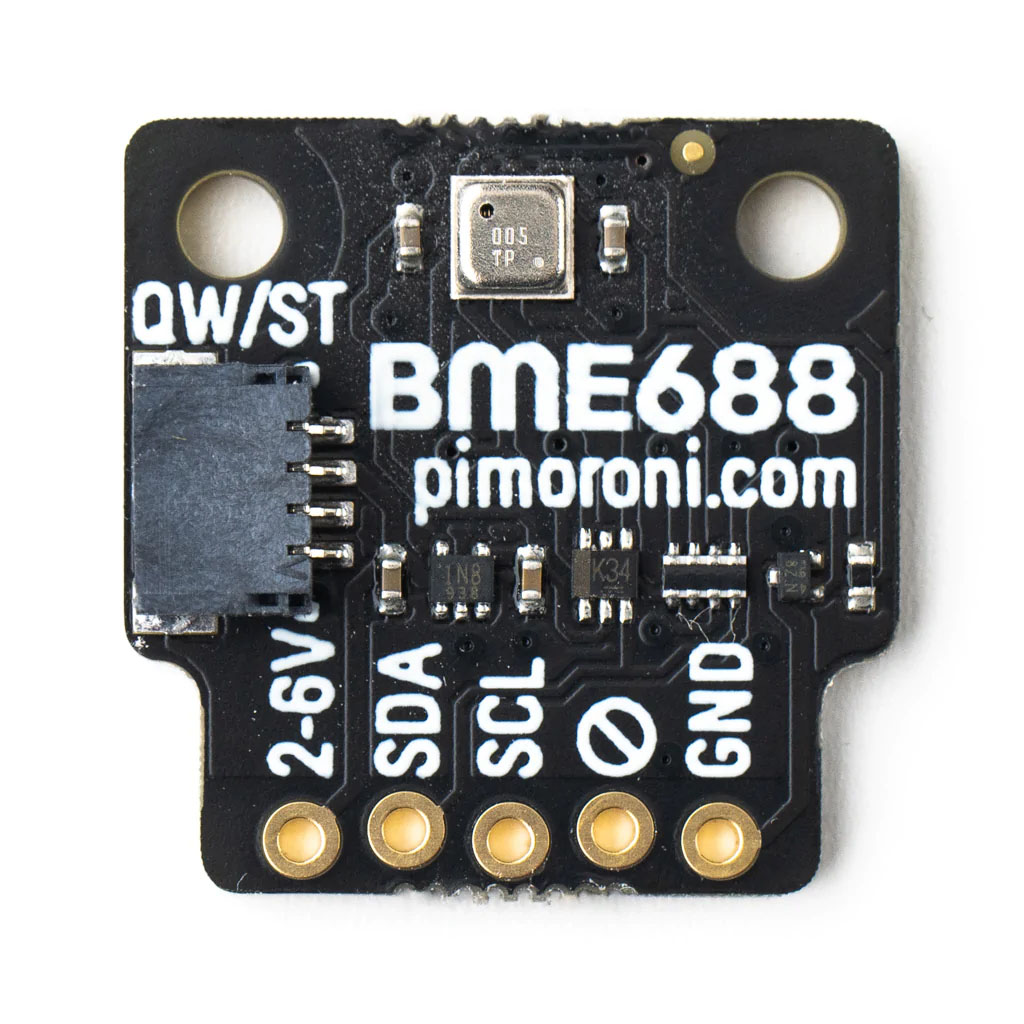
Technical data
| Parameter | Technical data |
|---|---|
| Package dimensions | 8-Pin LGA with metal 3.0 x 3.0 x 0.93 mm³ |
| Operation range (full accuracy) | Pressure: 300…1100 hPa Humidity 0…100% Temperature: -40…85°C |
| Supply voltage VDDIO Supply voltage VDD | 1.2 … 3.6 V 1.71 … 3.6 V |
| Interface | I²C and SPI |
| Average current consumption | 2.1 µA at 1 Hz humidity and temperature 3.1 µA at 1 Hz pressure and temperature 3.7 µA at 1 Hz humidity, pressure, and temperature 90 µA at ULP mode for p/h/T & air quality 0.9 mA at LP mode for p/h/T & air quality3.9 mA in standard gas scan mode (gas scan mode & scan rate can be optimized on applications with BME AI studio) |
| Gas sensor F1 score for H₂S scanning Standard scan speed Electric charge for standard scan Response time (τ 33-63%) Sensor-to-sensor deviation Power consumption Output data processing | 0.94 10.8 s / scan 0.18 mAh (5 scans ~ 1 min) < 1 s (for new sensors) +/- 15% +/- 15 < 0.1 mA in ultra-low power mode Major direct outputs: Index for Air Quality (IAQ), bVOC-& CO₂-equivalents (ppm), Gas scan result (%) & many more (all listed in the datasheet in Table 20: BSEC outputs) |
| Humidity sensor Response time (τ0-63%) Accuracy tolerance Hysteresis | 8 s ± 3 % relative humidity ≤ 1.5 % relative humidity |
| Pressure sensor RMS Noise Sensitivity Error Temperature coefficient offset | 0.12 Pa (equiv. to 1.7 cm) ± 0.25 % (equiv. to 1 m at 400 m height change) ±1.3 Pa/K (equiv. to ±10.9 cm at 1°C temperature change) |
These can be purchased at numerous outlets, for example Pimoroni, Pihut, etc
I tried to connect it to a Wemos D1 mini but couldn’t get it to work.
After an internet search I realised I needed to change the Tasmota version I was using to flash the Wemos D1 mini, from the normal version (tasmota.bin.gz), to the sensor version (tasmota-sensors.bin.gz). This can either be found at github, if you want to do the installation from the web, or at tasmota.com, where it can be downloaded and then installed using Tasmotizer
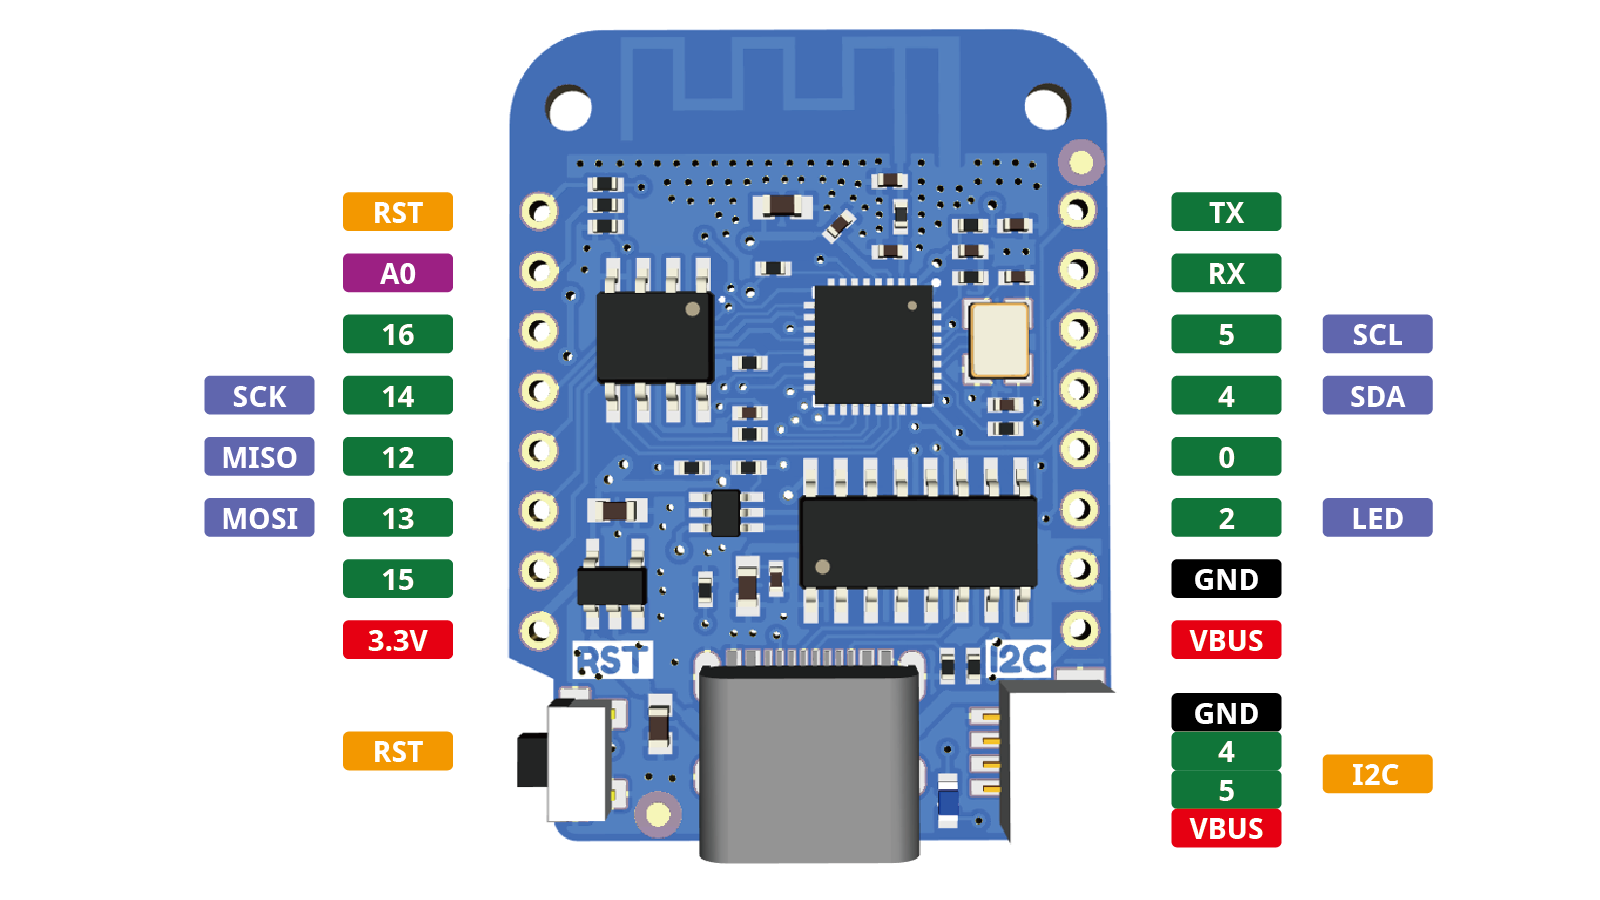
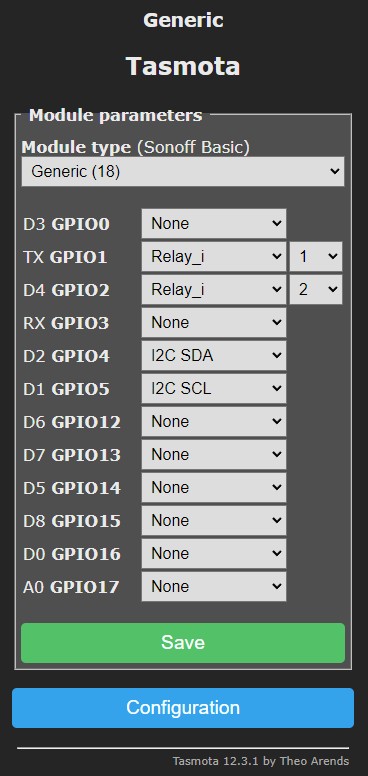
Having flashed the Wemos D1 mini and adding the WiFi credentials as described here, I opened up a web browser and connected to the Wemos D1 mini, setting up the module as shown below
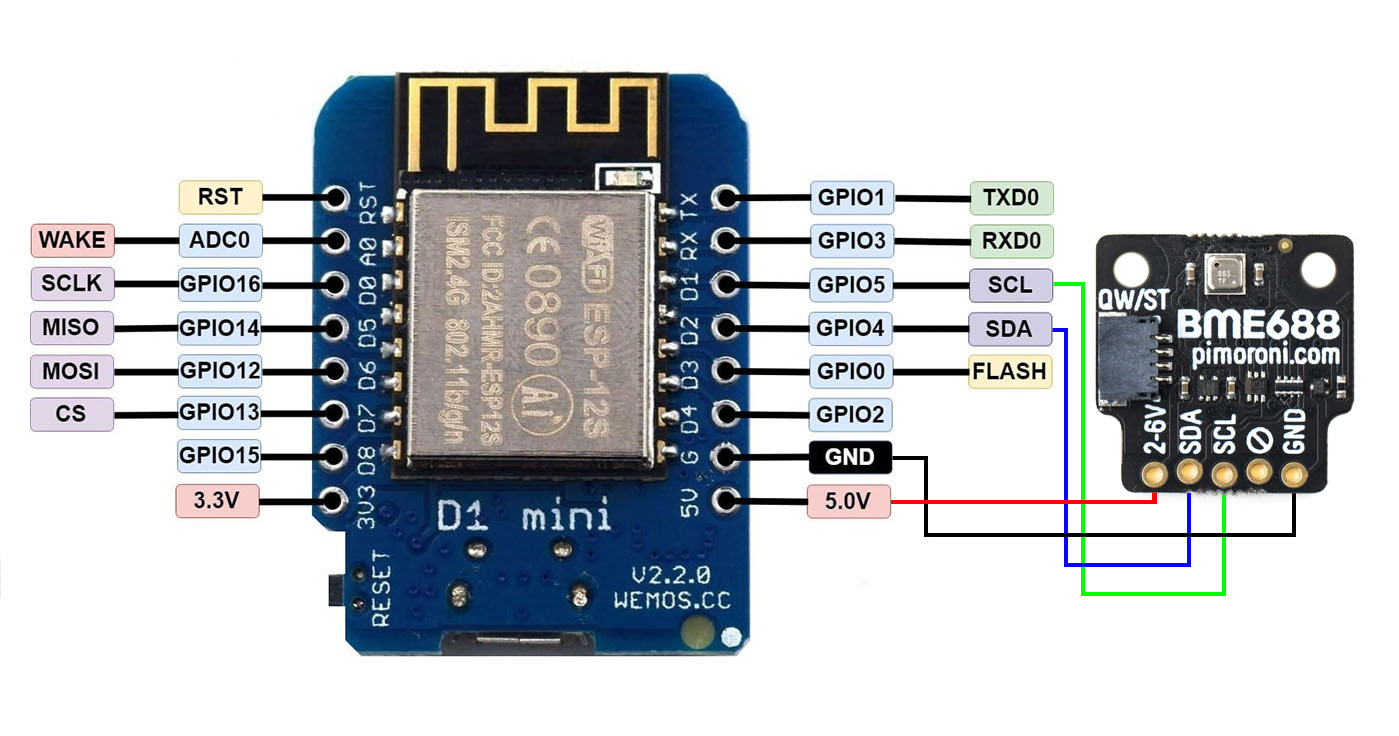
Switched off and connected the BME688 as shown below
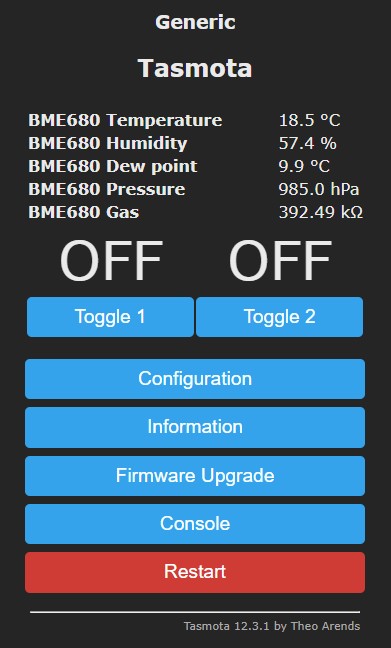
Once connected I switch it back on again and entered it’s IP address into the web browser which then showed the Tasmota GUI with the switches and the output of the BME688
All that was left to do was set up the MQTT to connect the sensor to MaxAir and Home Assistant.