Last Updated on 21/08/2022 by Kevin Agar
Having set up my heating system using a Raspberry pi 3B running MaxAir, which can be found here, I thought I would connect a sensor in the garden and a sensor in my fish tank to measure the temperatures. Up until now I was running 2 Raspberry pi zero W with Temperature-machine installed, but I wanted to integrate it all into a single WebUI.
I was going to use a Raspberry pi zero W and MQTT as I had a couple lying around, but after a conversation with someone I decided to try using WeMos D1 Mini (ESP8266)
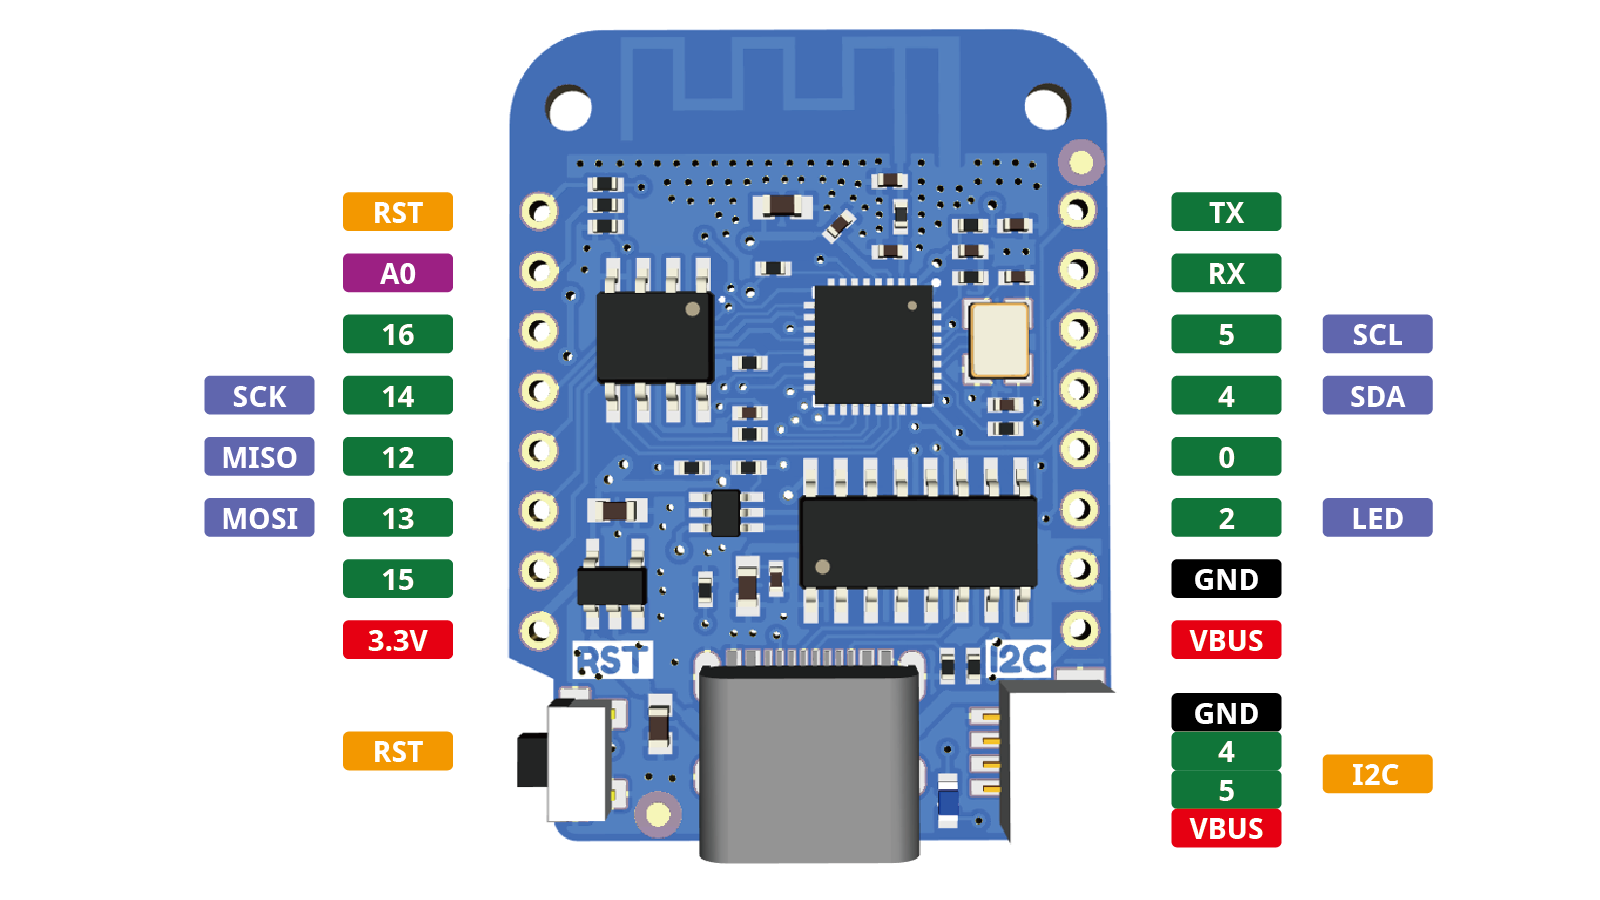
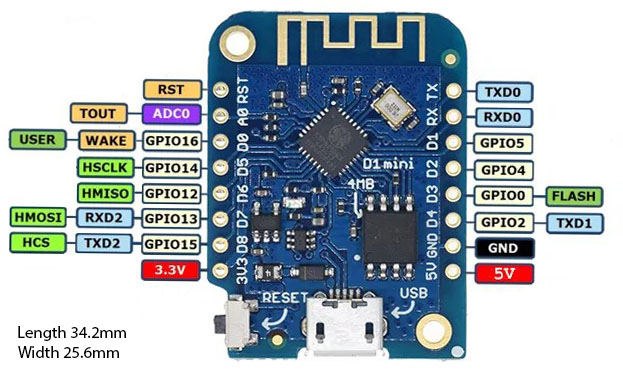
It would appear that they are easy to program with Tasmota.
To install Tasmota I went to
https://tasmota.github.io/install/
Followed the instructions and installed Tasmota without any problems
After installing Tasmota it needs to be connected to WiFi and set up.
Tasmota provides a wireless access point for easy Wi-Fi configuration.
Using my smartphone I searched for a Wi-Fi AP named tasmota_XXXXXX-#### (where XXXXXX is a string derived from the device’s MAC address and #### is a number) and connected to it.
After I connected to the Tasmota Wi-Fi AP, I opened
http://192.168.4.1
in a web browser.
Ignoring warnings that there is no Internet connection, and not connecting to a different network
It displayed
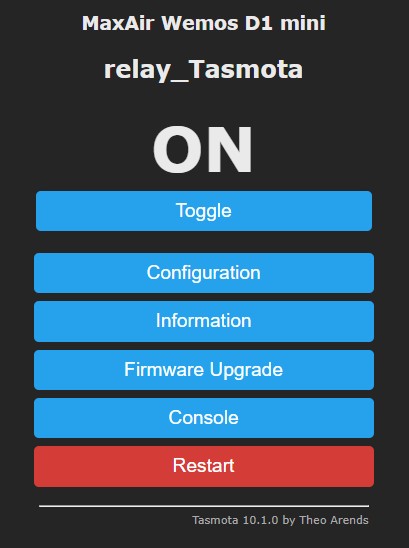
Selected Configuration
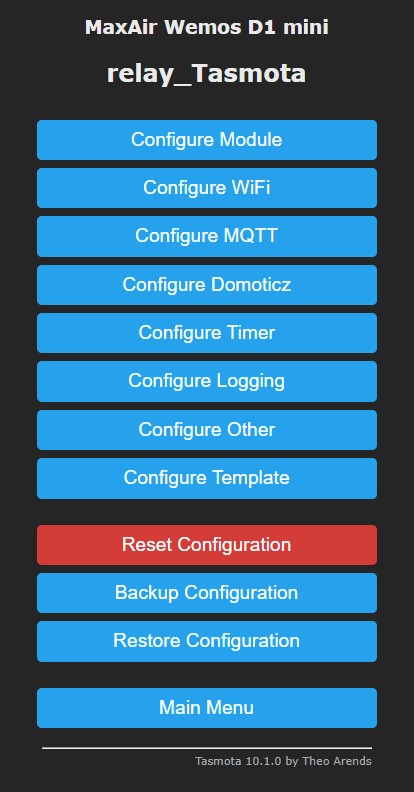
Selected Configure WiFi
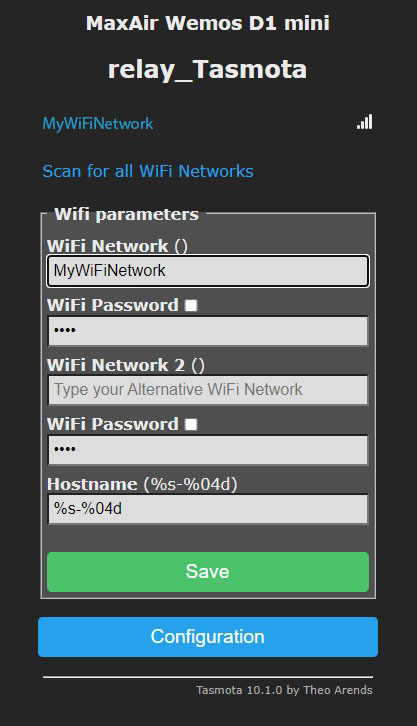
Entered my WiFi SSID and password, then saved.
The device then tries to connect to the network entered

When it was successful, I saw this message:
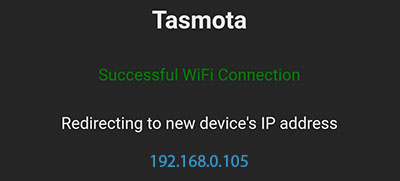
My WeMos D1 Mini (ESP8266) was now connected to my network. Personally, I like to reserve IP addresses for everything that’s permanently attached to my Network but that’s entirely up to you.
Having done this for the Garden Temperature I repeated the process for the Fishtank Temperature, and while I was at it I also set up another for the Fishtank lights so I could then control them with a schedule in MaxAir.
For the module configuration go to https://tasmota.github.io/docs/devices/Wemos-D1-Mini/
Having set up the WeMos D1 Mini (ESP8266) and installed Tasmota, I needed to connect a temperature sensor and connect to MaxAir with MQTT.
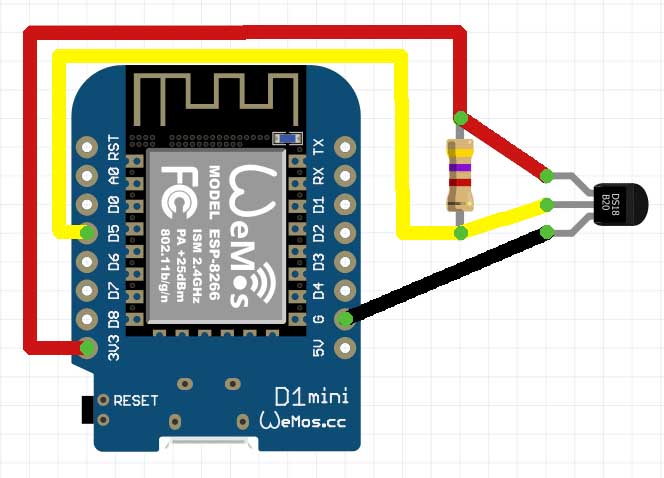
I’m using waterproof DS18B20 sensors and connected them to Ground, 3.3V, and D5, with a resistor between D5 and 3.3V as shown below
Having connected the DS18B20 sensors, the Tasmota needed to be configured for the sensor, and then connected to MaxAir by MQTT
Going into the Module configuration, selecting generic (18), and saving it. After the restart, I went into Module configuration again and changed D5 GPIO14 to DS18X20, saved and rebooted again.
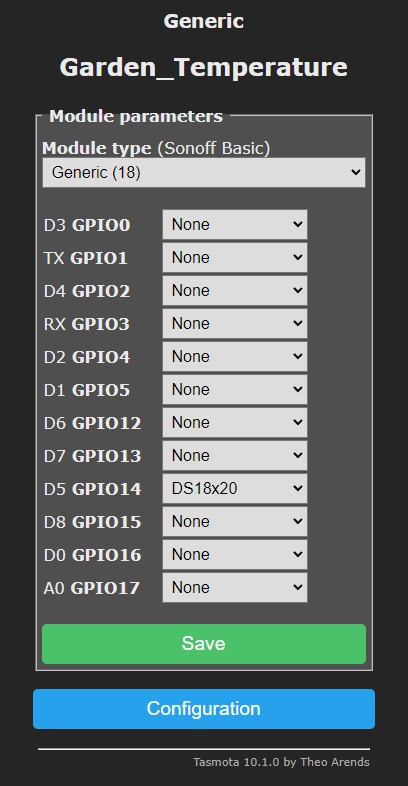
Now the temperature is displayed on the home screen
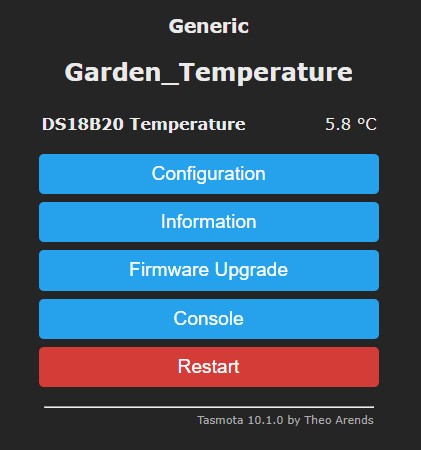
Next MQTT needed to be set up to transfer the temperature sensor reading to MaxAir
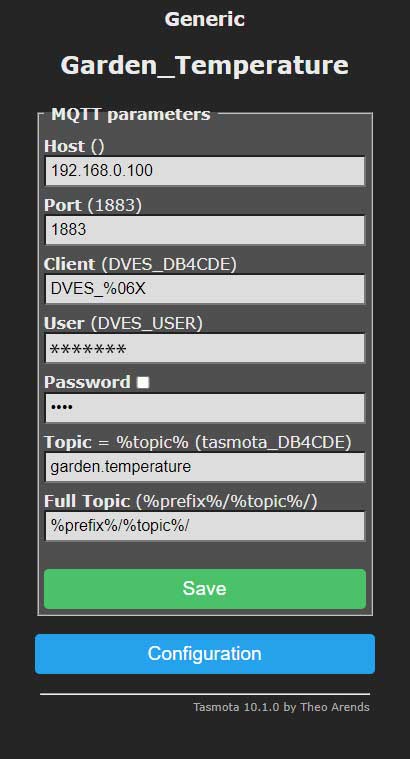
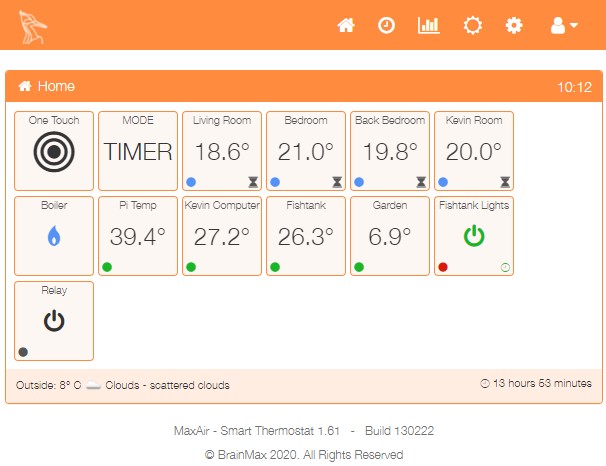
Saved the settings and then checked in MaxAir that it was receiving the sensor data
Everything was working well so the next project was to connect the Fishtank lights to MaxAir via MQTT so I could control them from there. Rather than use a WeMos D1 Mini (ESP8266) connected to a relay, I decided to use a Sonoff basic switch which it’s possible to program with Tasmota. How this was done can be found here